
 AhsayCBS (DIY)
How to create Exchange mail-level backup for 2013 CU19 or below
Product Version
Operating System
Description
This article describes how to create a MS Exchange mail level backup set for Microsoft Exchange Server 2013 Cumulative Update 19 or below
Solution
Confirm that all requirements are met by the client server:
Requirement Checklist
AhsayOBM installation
AhsayOBM must be installed on the Exchange server hosting the database (e.g. Exchange server with mailbox role).
Mailbox access permission
The Active Directory account used for backup must have full access to the mailboxes. To grant full access right for the account, enter the following command in Exchange Management Powershell:
>Get-Mailbox | Add-MailboxPermission -User "%os_username%" -AccessRights FullAccess%os_username% is the username of the operating system account for backup.Membership setting of the operating system account
The Active Directory account used for the backup must be a member of the following security groups:
- Microsoft Exchange Security \ Organization Management
- Users \ Administrator
- Users \ Domain Admins
- Users \ Enterprise Admins
Remote Exchange Management Shell
Remote Exchange Management Shell must be enabled for the operating system account used for the backup. To do that, enter the following command in Exchange Management Powershell:
>Set-User "%os_username%" -RemotePowerShellEnabled $TrueMailbox enabled
The Active Directory account used for the backup must be have one or more Exchange Server mailboxes associated with it.
Collaboration Data Objects (CDO) 1.2.1 installation
MAPI Collaboration Data Objects (CDO) 1.2.1 must be installed on the Exchange server.
LAN Manager authentication level
The LAN Manager authentication level configured on the Exchange server must be level 3 or above. To check on the setting:
- Open Local Security Policy from Administrative Tools.
- Under Security Settings, expand Local Policies, Security Options, Network security: LAN Manager authentication level.
- Ensure that the setting is configured to use NTLMv2, for example:
- Send NTLMv2 response only
- Send NTLMv2 response only. Refuse LM
Send NTLMv2 response only. Refuse LM & NTLM

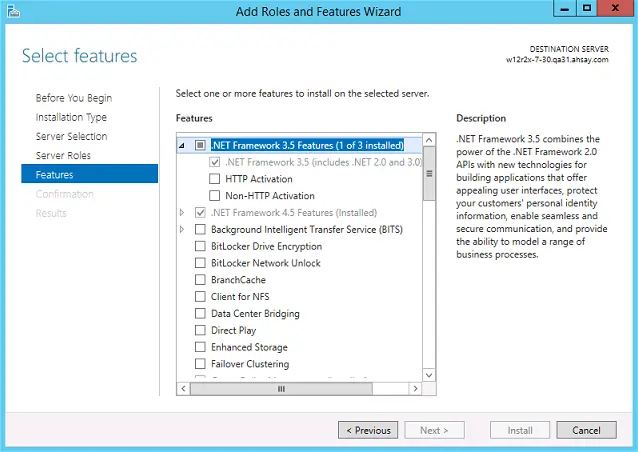
.NET Framework 3.5 Features
.NET Framework 3.5 Features must be installed.
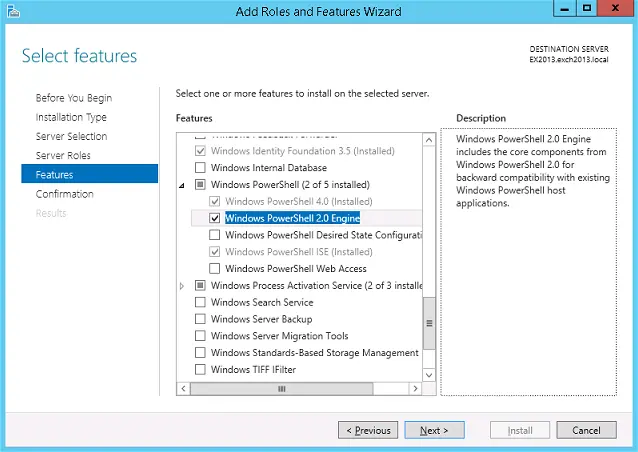
Windows PowerShell 2.0 Engine
Windows PowerShell 2.0 Engine must be installed.
Create Backupset
With all requirements met, you can create the Exchange mail level backup set:
- Login to the AhsayOBM client user interface.
Select the Backup Sets tile, and the Add button.
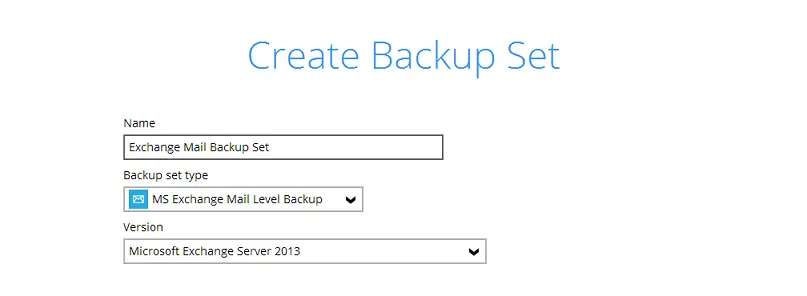
Select MS Exchange Mail Level Backup backup set type, and the corresponding Exchange Version. Then enter the backup set name:
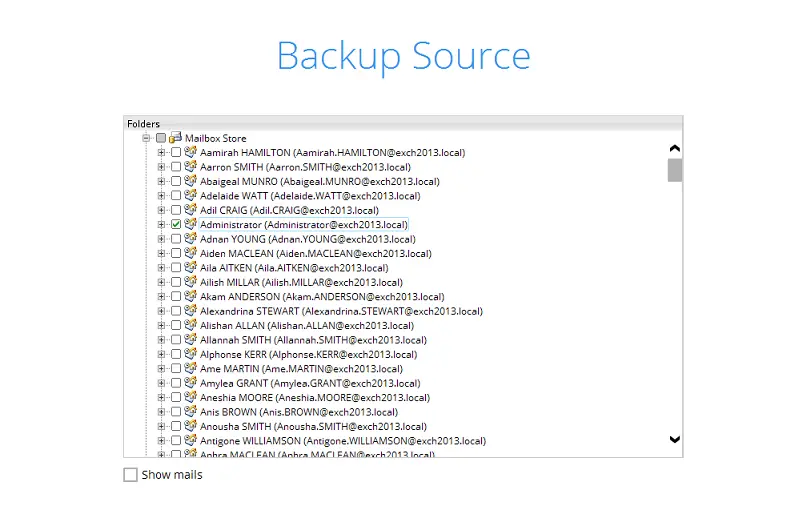
Configure the backup source of the backup set, select all mailboxes within the mailbox store by selecting the Mailbox Store:

To select individual mailbox for backup, expand the Mailbox Store. Click Show mails to select individual mail items to be backup:
- Click OK afterward.
Click Add new storage destination / destination pool to add the cloud storage destination.
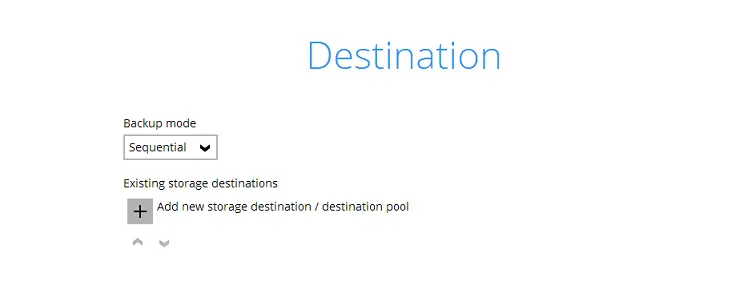 It is strongly recommended that all backup sets are configured to backup to multiple backup destinations, to provide user with data redundancy and backup / restore flexibility.
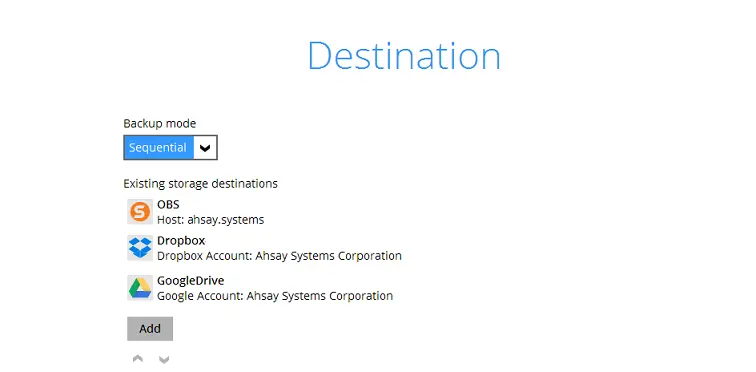
- Continue by configuring a backup schedule and encryption setting for the backup set.
- Click the Backup now button to start the initial backup job, or allow the job to start at its scheduled time.