Article ID
Last Reviewed Date
Product Version
Operating System
Description
This Know-How article explains how to perform the initial backup to a removable drive on the customer site. Then transport the removable drive to the data center and copy the data directly onto the AhsayCBS / Predefined destination bypassing the Internet. This procedure is highly recommended for backup set with large data size and / or network with slow connection speed.
Although the instruction is described for AhsayCBS / Predefined destination, the same steps can also be performed for other backup destinations like FTP, SFTP and Cloud Storage destinations.
Solution
-
First, configure the backup set to perform the initial backup to a local destination (e.g. removable hard drive).
- Login to the AhsayOBM / AhsayACB client user interface.
-
Click Backup Sets, then the corresponding backup set.
-
Click Destination then click Add.
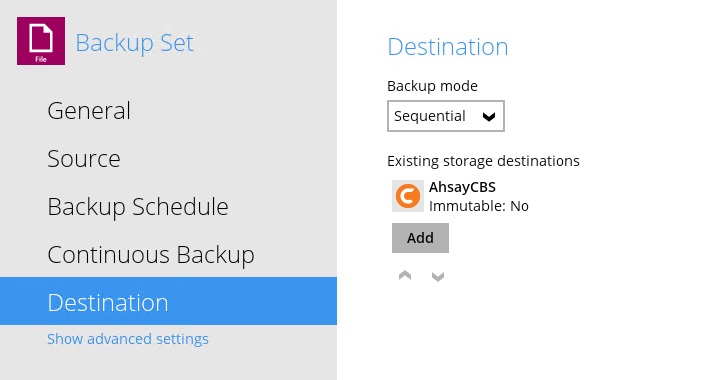 This assumed that the 'import destination' in this case AhsayCBS had already been added to the backup set.
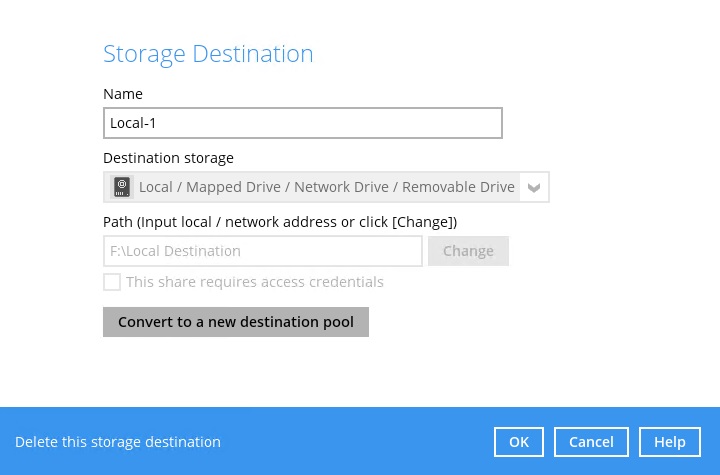
 - From the 'Destination storage' dropdown menu, select Local / Mapped Drive / Network Drive / Removable Drive.
-
Ensure that the destination type is set to Single storage destination, then click the Change button to browse for the removable hard drive.
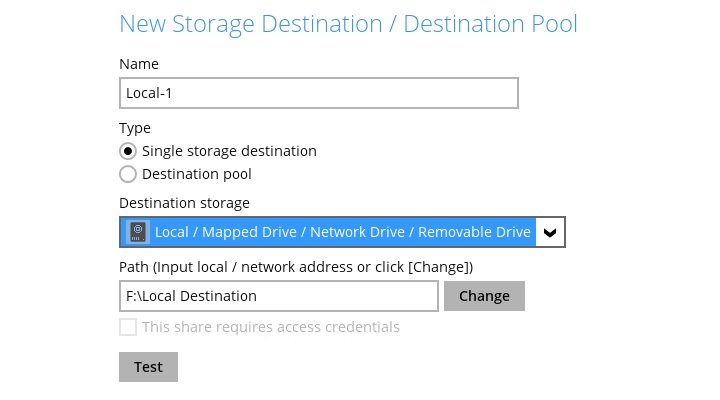
- Click OK then Save.
-
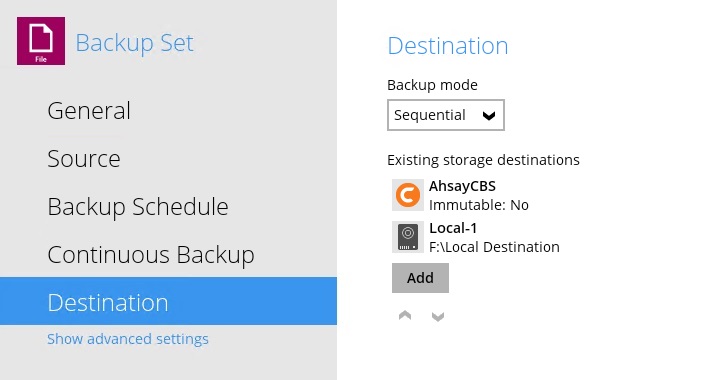
Make sure that the import destination and the local destination are added.
-
Next, perform the initial backup to the local destination (e.g. removable hard drive).
-
In the client user interface, click Backup.
-
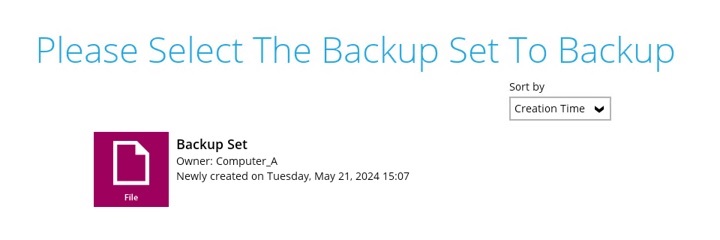
Select the corresponding backup set to backup.
-
Under 'Destinations', deselect all destinations except for the newly created local destination.
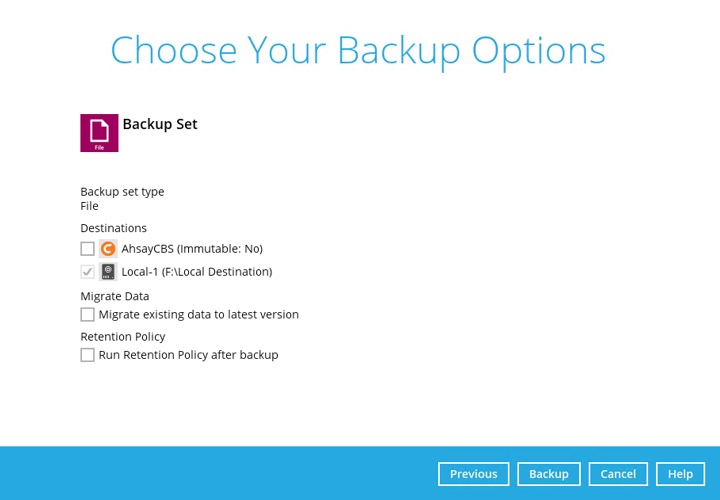
- Click Backup to start the initial backup.
-
-
Import the data from the local destination (e.g. removable hard drive) to the AhsayCBS and Predefined destination (e.g. Google Drive, OneDrive, Dropbox).
Copy the data (the entire 'backupset_id' folder) from the removable drive at %Local_Destination%\%backupset_id%\*.
Import the data to:
-
AhsayCBS by copying to the user home path of the corresponding backup user at %User_Home%\username\.
Example:
%Local_Destination%\1614311678846\*
to
%User_Home%\username\1614311678846\*
-
Google Drive destination by copying to the corresponding location on Google Drive at My Drive > Ahsay > %backupset_id%.
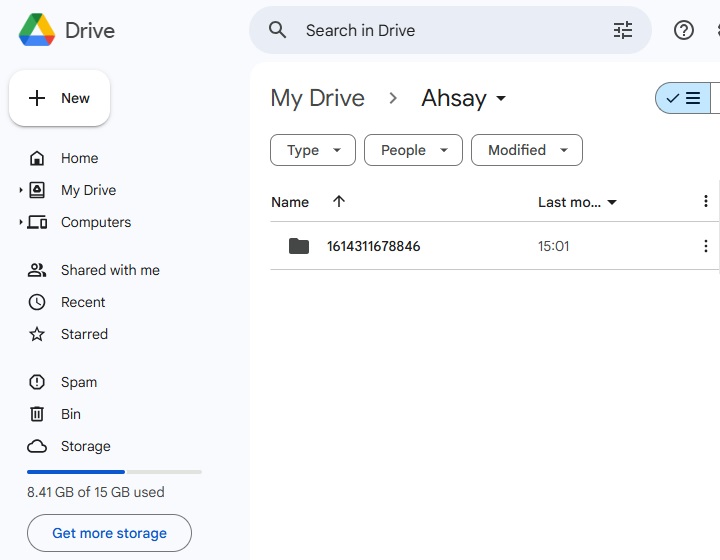
Example:
%Local_Destination%\1614311678846\*
to
My Drive > Ahsay > 1614311678846
-
OneDrive destination by copying to the corresponding location on OneDrive at My files > Apps > Ahsay > %backupset_id%.
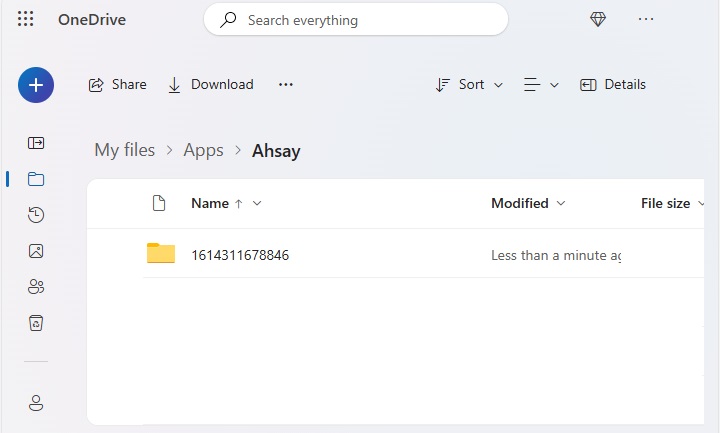
Example:
%Local_Destination%\1614311678846\*
to
My files > Apps > Ahsay > 1614311678846
-
Dropbox destination by copying to the corresponding location on Dropbox at All files > Apps > Ahsay > %backupset_id%.
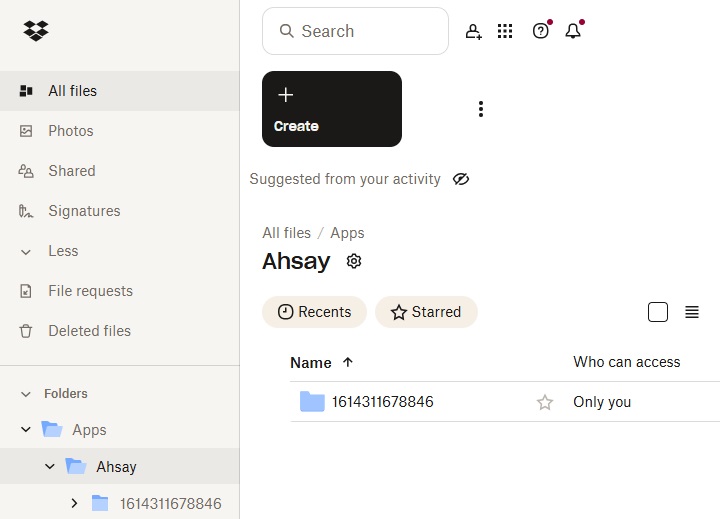
Example:
%Local_Destination%\1614311678846\*
to
All files > Apps > Ahsay > 1614311678846
Do not perform another backup job while the data are being copied from the removable hard drive to the backup destination.
Administrator can:
- Temporarily suspend the backup user while the data are being copied, and
-
Temporarily disable the backup schedule(s) of the corresponding backup set.
-
-
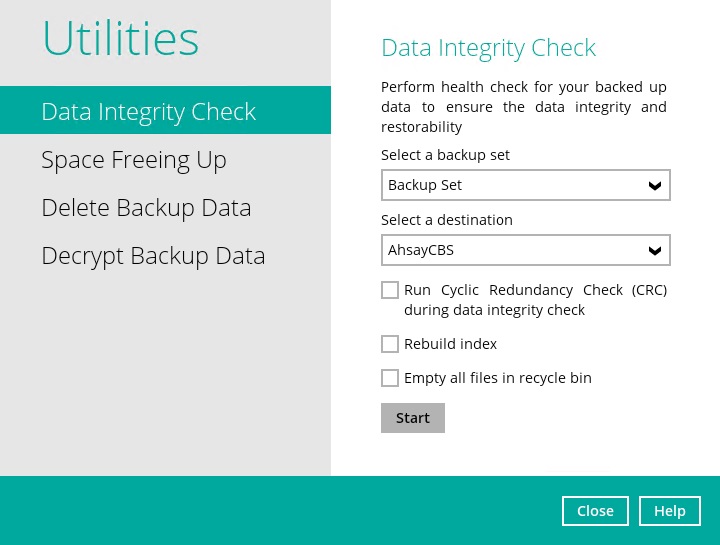
Perform a Data Integrity Check for the corresponding backup set.
- Login to the AhsayOBM / AhsayACB client user interface.
- Click Utilities > Data Integrity Check, then the corresponding backup set and backup destination.
-
Click Start to begin the data integrity check.
-
The import procedure is completed.
Re-enable the backup user and/or backup schedule(s), then remove the local destination (e.g. removable hard drive) afterward.
